Payables
Last updated: September 4, 2025
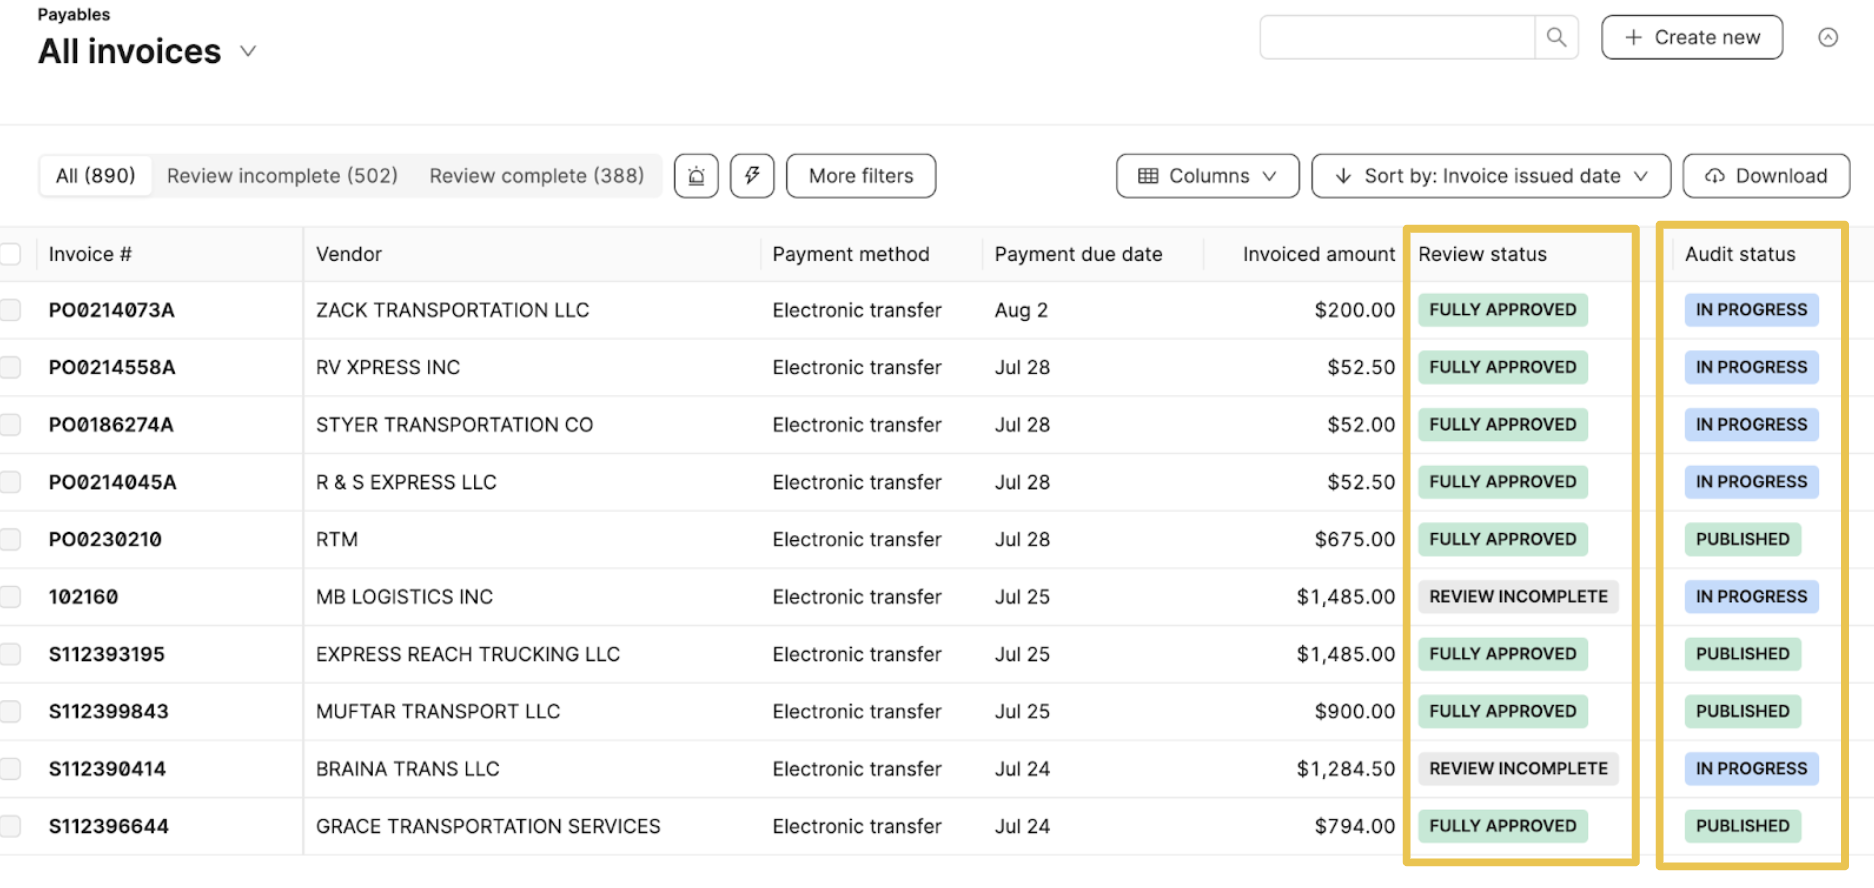
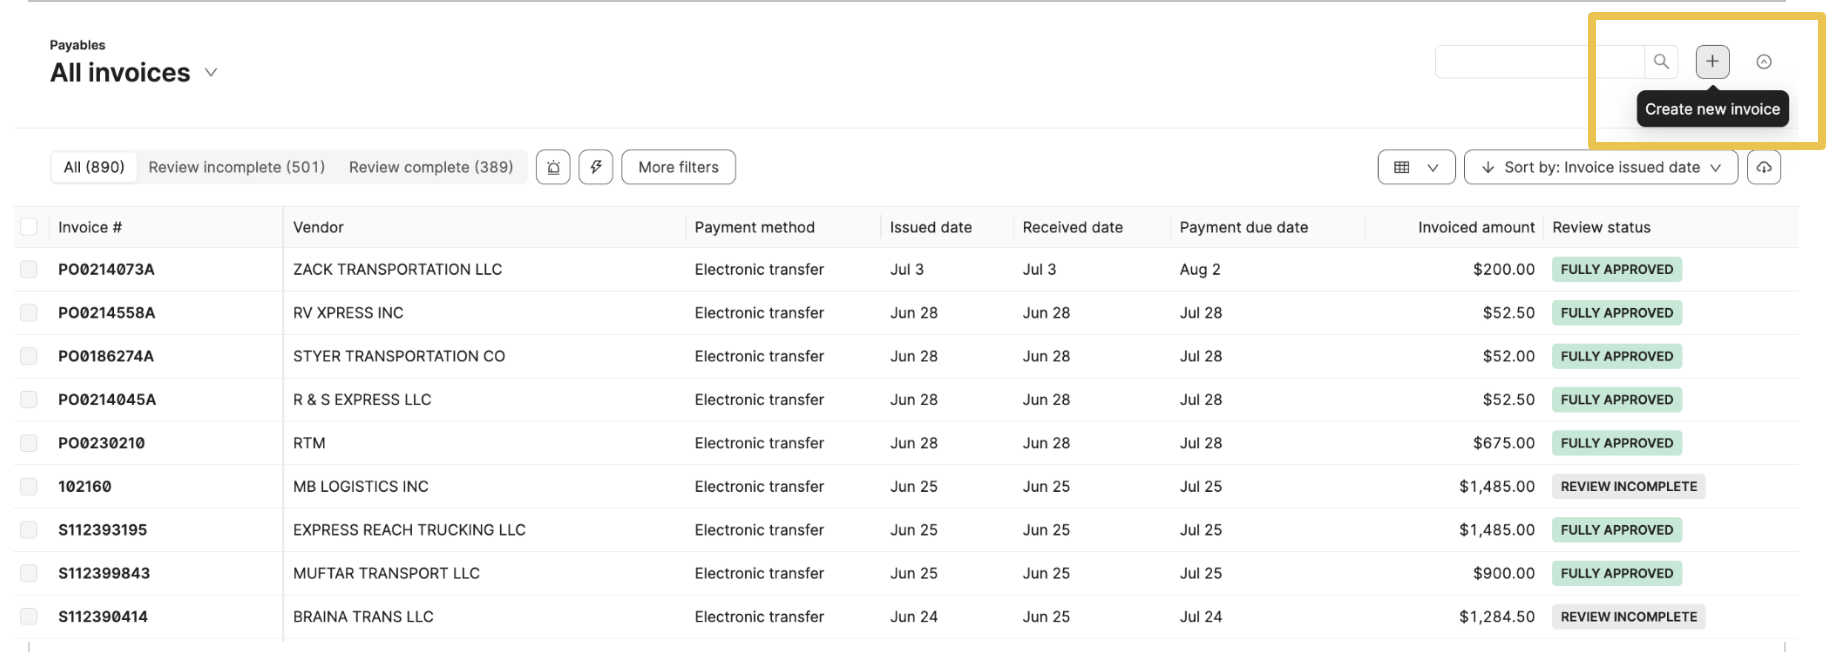
Payables Table
The Payables tables allow you to view all AP Invoices. The top banner filters to "All," "Review incomplete," and "Review complete." The buzz icon provides a quick filter for Exceptions and QuickPay invoices. The "Download" button lets you export data from Loop for internal review and reporting.
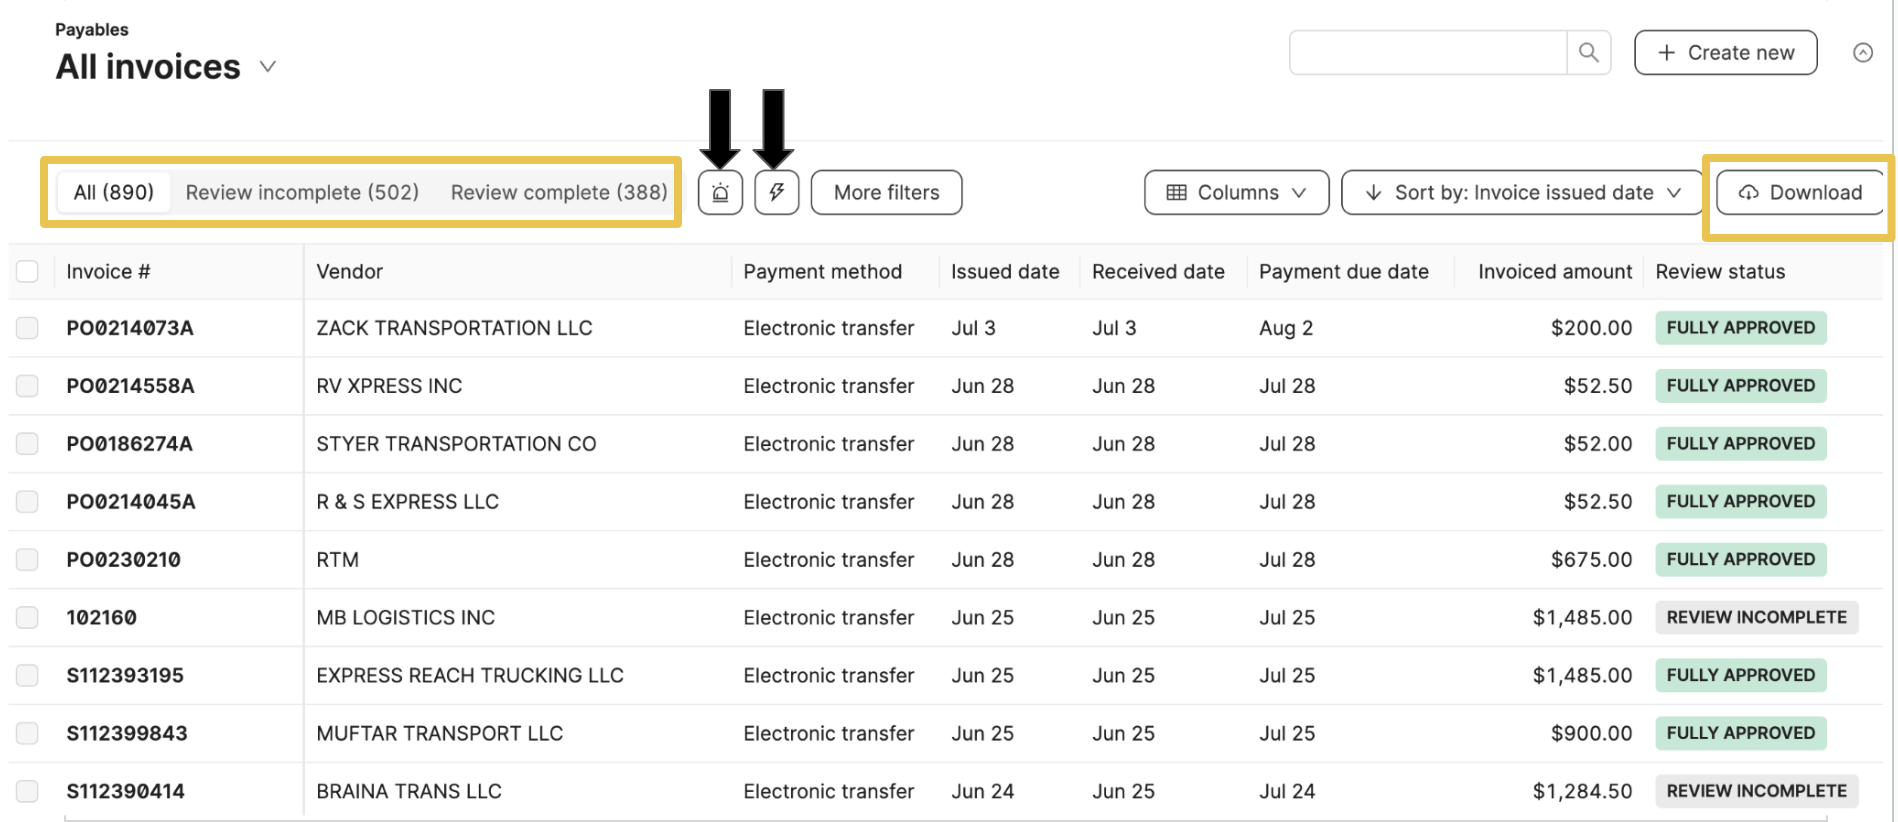
Use the Filter and Columns buttons to update the table for more granular information.
The columns display information such as Invoice #, Vendor, Payment method, Invoice amount, Review status, and Audit status.
Review Status
Fully Approved - The invoice was approved in full (total approved amount = total invoice amount)
Partially Approved - The invoice was partially approved
Review Incomplete - The invoice has not been approved
Audit Status
In Progress - Audit is still moving through the extraction/audit process
Published - Extraction and audit have been completed
Tip: Hover over the Review status to see which user last reviewed the invoice and the date it was reviewed.
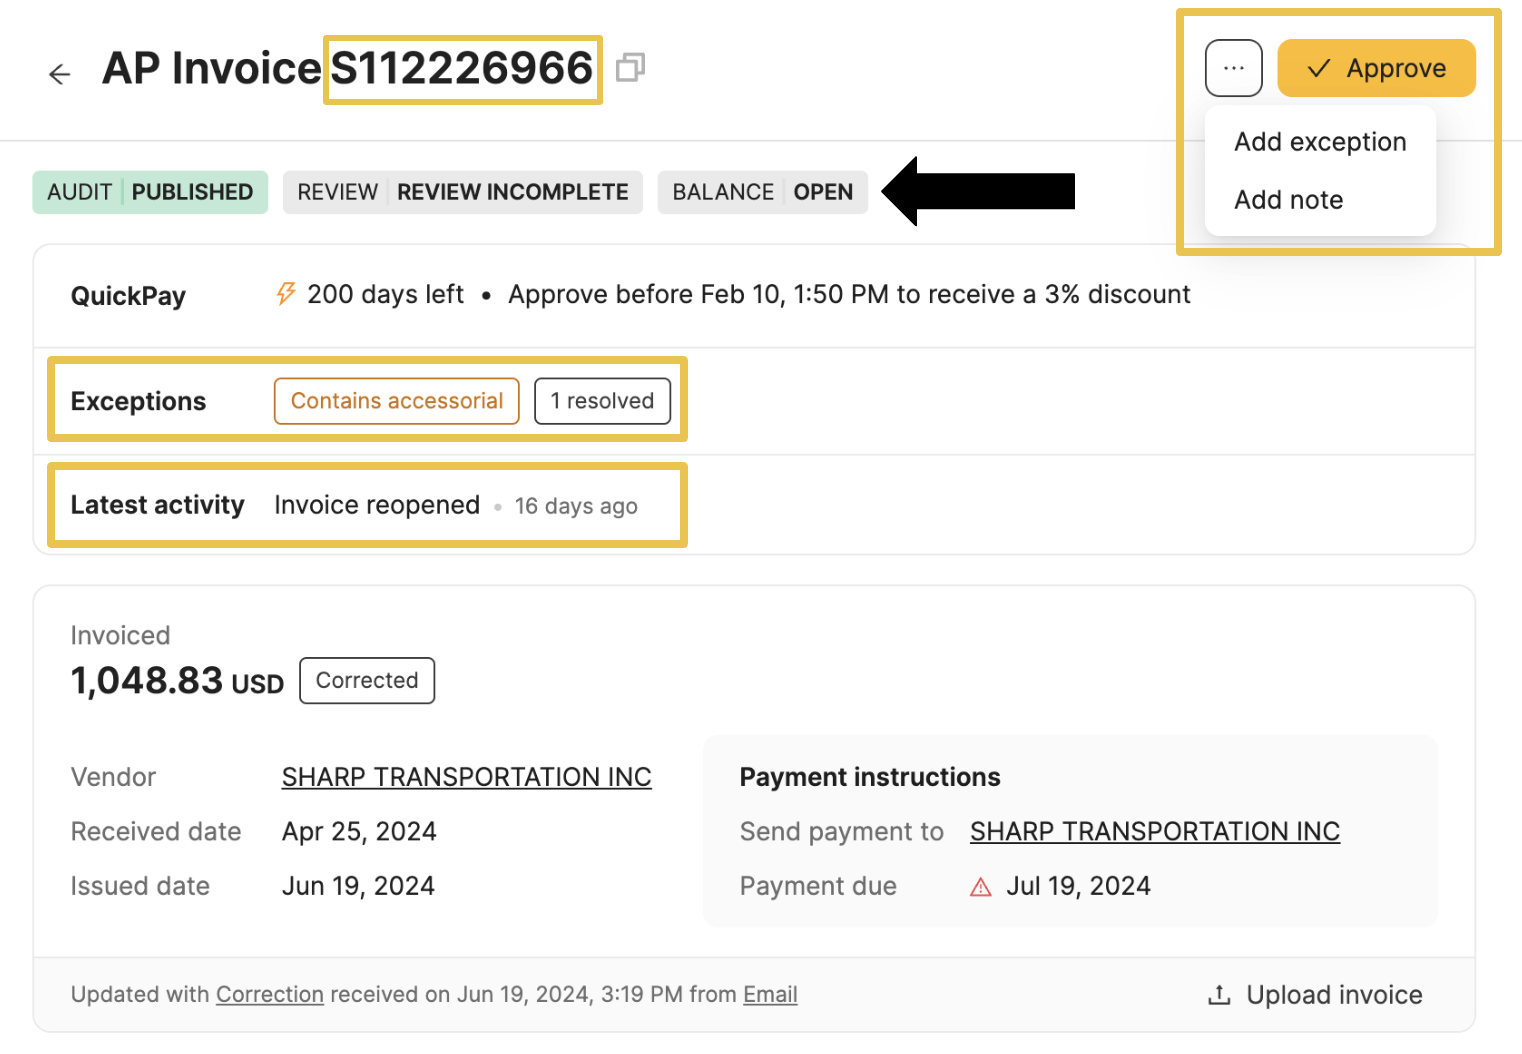
AP Invoice
Click on the invoice hyperlink to view the details. The invoice number is easily copiable at the top of the page. The three dots in the upper right corner of the page allow you to add an exception and a note.
If the Review Status is "Review Incomplete", a large yellow Approve button will appear in the top right corner. All statuses are displayed on the top banner. Below the statuses will show QuickPay and Exceptions (if applicable).
Once an action is performed on the AP invoice the "Latest Activity" banner will appear. Click on the banner to populate the Activity Feed on the high-hand panel. The actions displayed are: Approve, Reopen, Archive, or Reject.
The invoice card will show the invoiced amount, vendor, and payment instructions. Below the card is the invoice artifact link which was ingested by Loop to create the AP Invoice. Click "upload invoice" to add a new invoice artifact.
Below the summary is the "Line Items" tab. The line items provide a categorized list of the charges on the invoice.
Invoiced - the amount invoiced on the invoice broken out by line item
Expected - the amount Loop found should be invoiced while auditing
Users can click on the "Expected" dropdown and change it to "Variance." The Variance indicates the difference between the invoiced and expected amount.
To approve, the amount that needs to be paid. Users can change the amount by clicking into the box, changing the total
Below the Line item breakdown is the "Adjustment" panel where offline payments (payments made outside of Loop’s system) and QuickPay discounts are displayed.
Offline payments are sent over in the Shipment Record via API
The Total Amount is the final payment amount within Loop’s system
You can remove and re-apply the offline payment, if needed, with the small button next to the amount

Payments
Once the invoice is approved, the payment will automatically be scheduled and appear under the “Payments” tab (if enrolled in Payments).
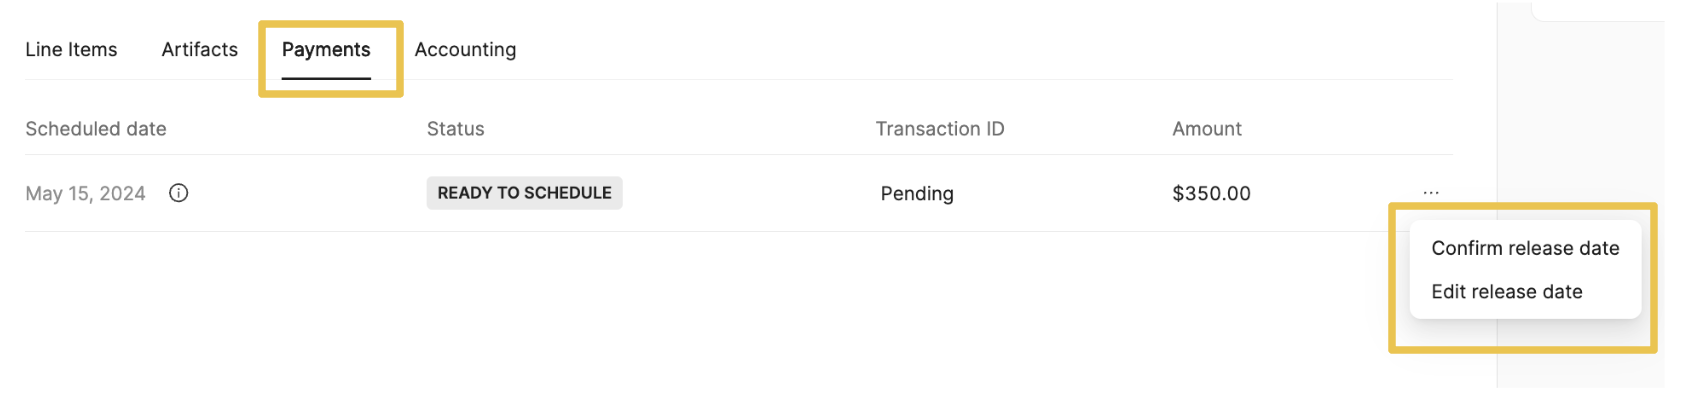
Confirm or edit the scheduled payment by clicking the three dots on the right side.
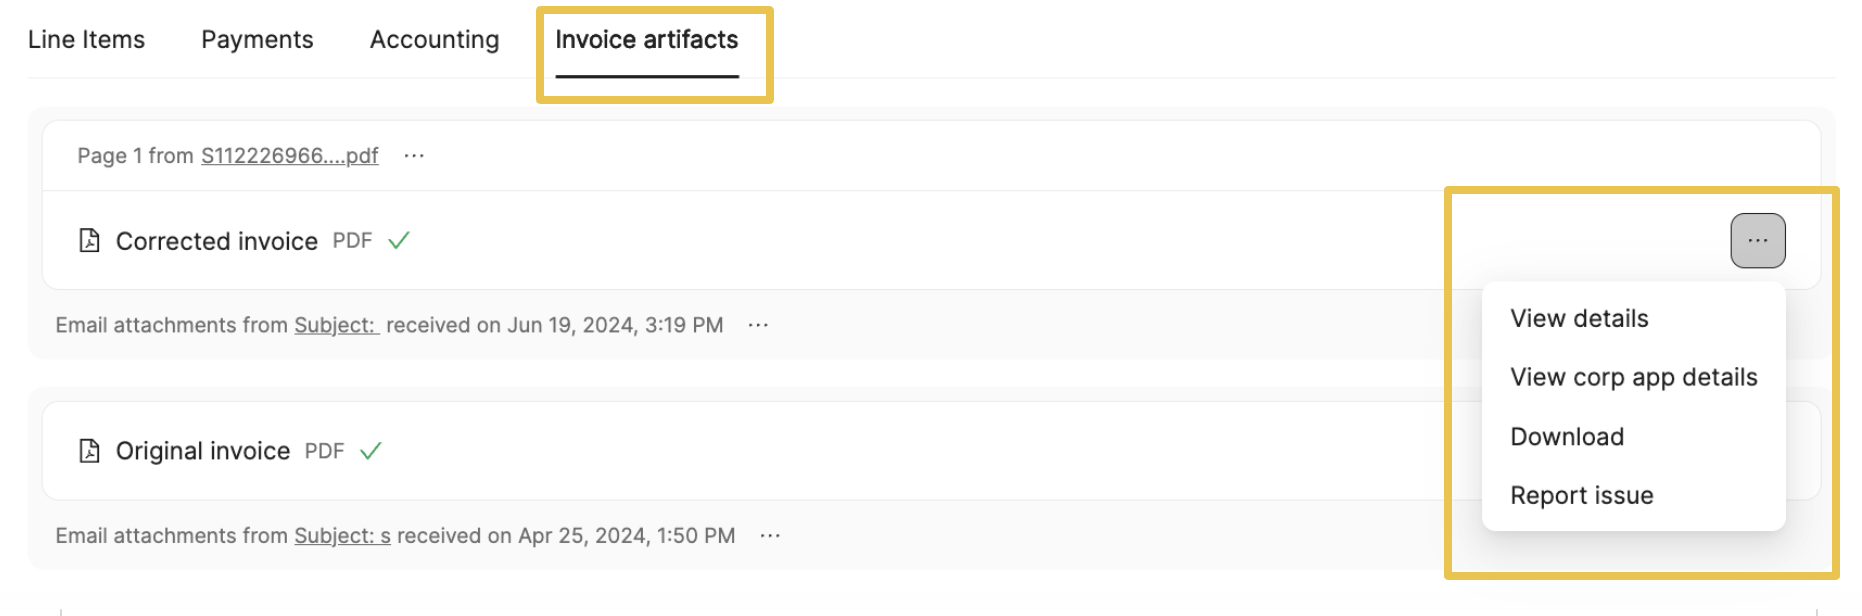
Invoice Artifacts
In this tab, you can view all the related invoice artifacts. Click the three-dot button to view details and download.
Edit Payee
To ensure the correct payee is listed on any payable invoice, Loop allows users to edit the payee directly.
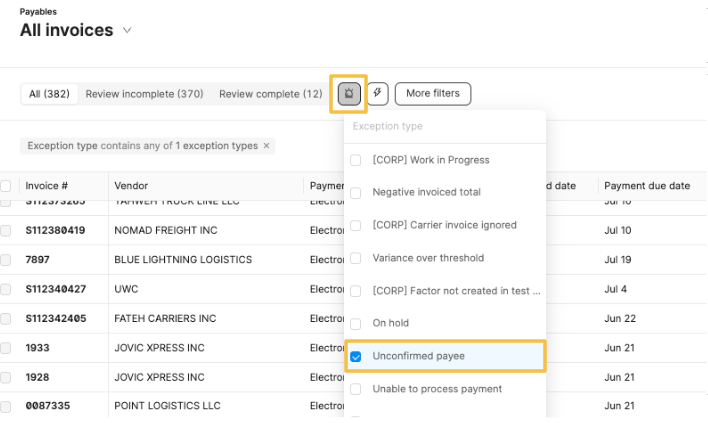
In cases where Loop detects a potential incorrect payee, an exception will be added to the AP Invoice. On the Payables main table, use the buzz icon to filter the Exceptions "Unconfirmed payee” to review and resolve these issues.
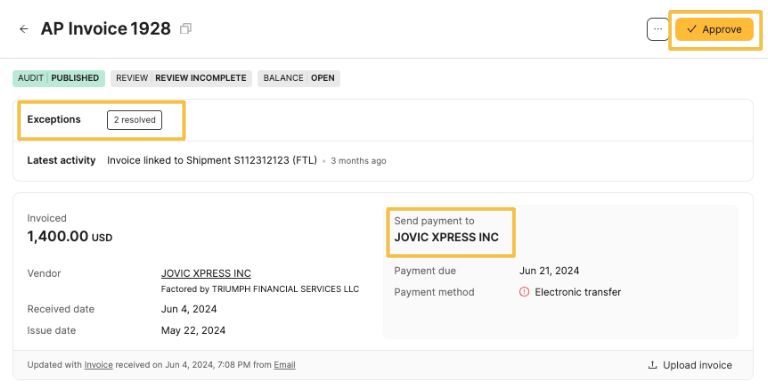
Select the invoice hyperlink to view the AP invoice details. In the light gray box with payment information, there will be an option to edit the payee.

Clicking this will show you some potential options: the payee extracted from the invoice, the vendor on the shipment job, and any existing factoring relationships. You can also choose any other payee as well.

Once you select the correct payee and click Confirm, the AP Invoice will update. The exception will automatically resolve, the "Send payment to" section will update to the new organization, and the Approve button will now appear in the top right corner to approve the AP Invoice.
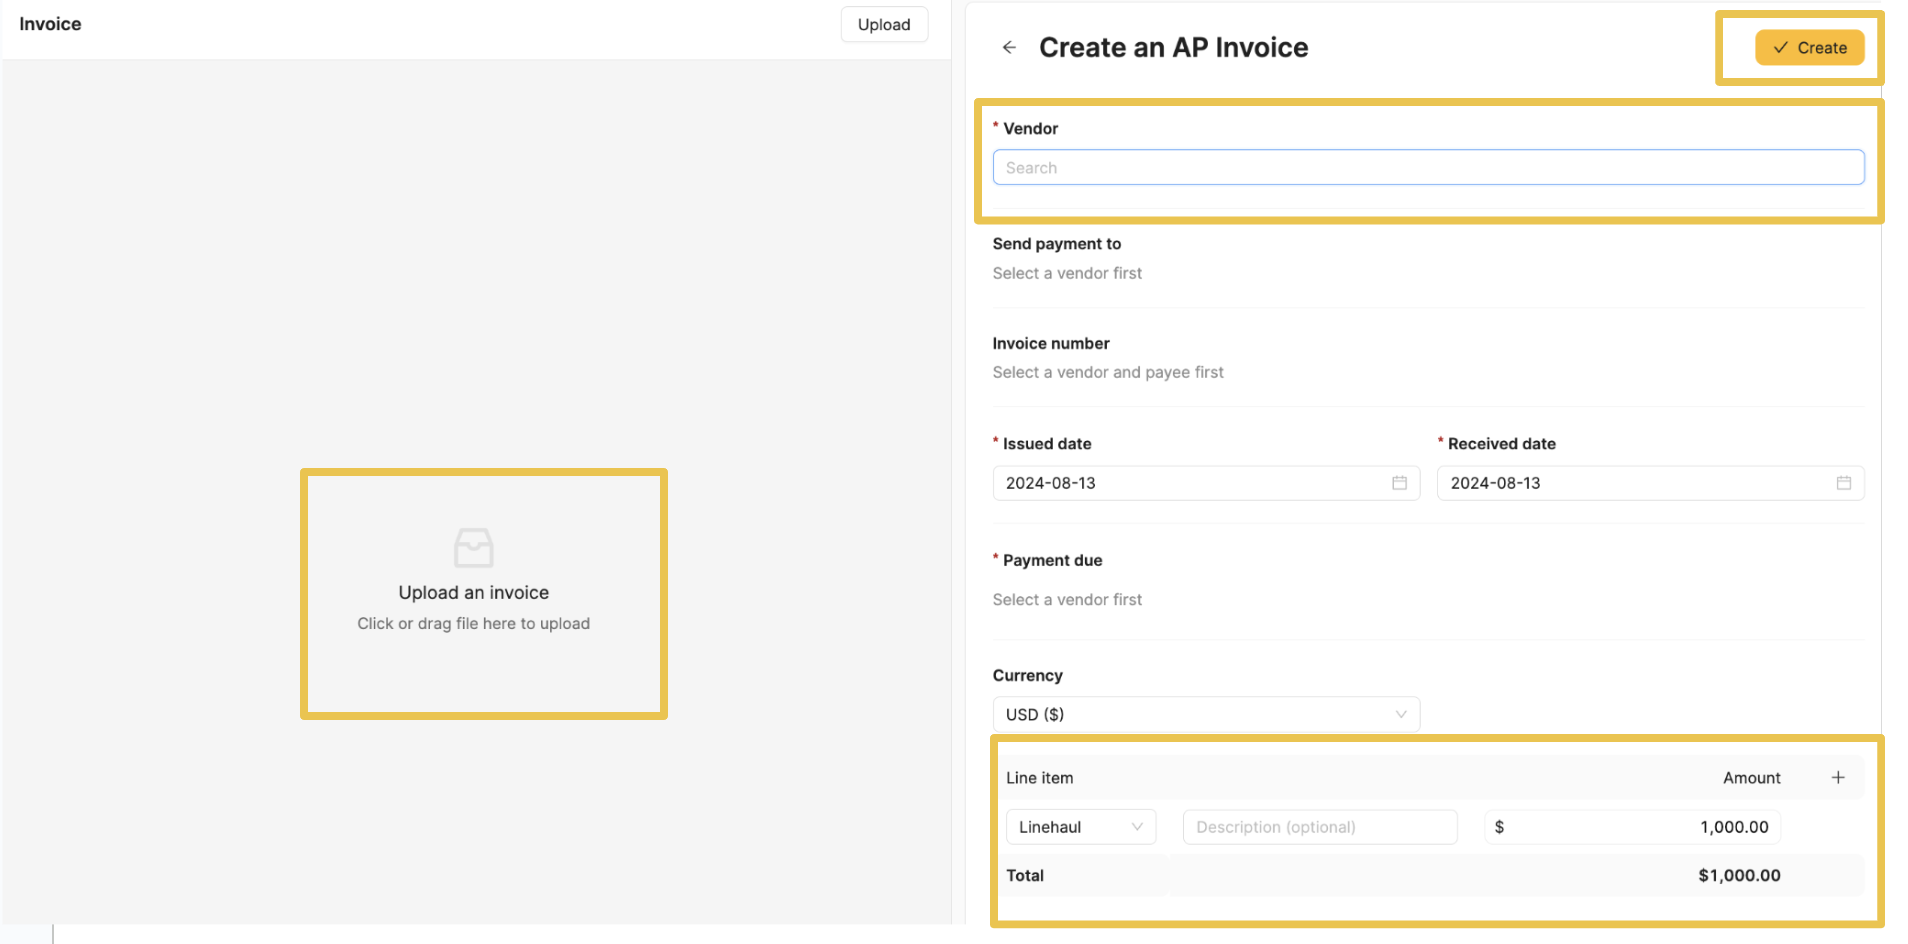
Create a New Invoice
If you need to approve an invoice quickly, you can create one from scratch. On the Payables main table, click the + sign button at the top right corner.
You can also create an invoice using automation if you have a well-formatted invoice. Read more here.
A pop-up will appear to add a file on the left side panel. On the right-side panel, you can add the invoice information, including:
Vendor
Send payment to
Invoice number
Issue and Received dates
Payment due
Currency
The line item section allows you to manually add the specific charges. You can add more lines by clicking the + sign. Click Create to complete.